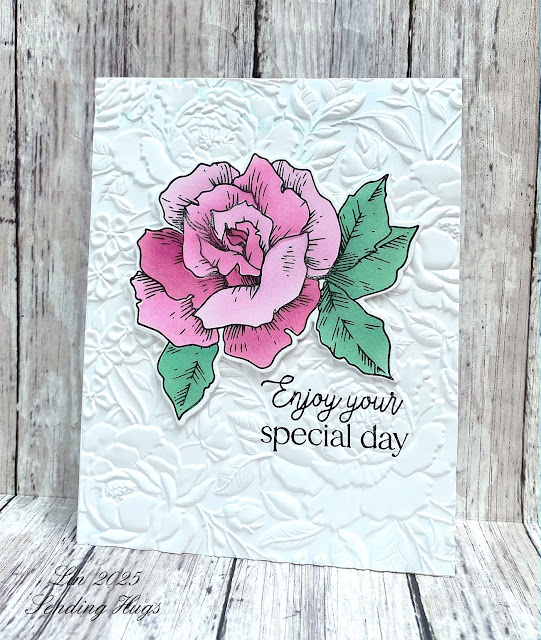
Here's my card for this month's Woodblock Wednesday over at Amy's blog. The woodblock stamp I chose this month is from Hero Arts, called Wallpaper Flowers, dated 2009.
Pages
Wednesday, April 30, 2025
Woodblock Wednesday: Wallpaper Flowers
Monday, April 28, 2025
Sunny Thoughts
Once upon a time, not so long ago, there was a challenge blog named The Play Date Cafe. One of my favorite recurring challenges there was called "Black and White and a Splash". Here's a card inspired by that challenge.
Saturday, April 26, 2025
Spring Breeze Hello
I thought the Waffle Flower Spring Breeze stencils would be a fun addition to my collection, especially because of the butterflies. I enjoyed bringing the design to life, and then gave it an overnight to decide how I wanted to proceed with my card.
This morning I decided to try the eclipse/hidden message technique.
Thursday, April 24, 2025
CASEing Donna
Earlier this year a challenge blog featured a card by my Hero Arts sister Donna Mikasa. I couldn't play at the time, but pinned her card, and today I have a card that CASEs it.
I loved her idea of mixing a stenciled panel with a similar embossed one, but she went a step further, and carried the embossing onto the stenciled panel. Here's my version of her design.
Donna used an interesting sentiment block, so I went looking through my stash for something, having in mind a vertical sentiment, but found this old Hero Arts one instead. It's dated 2009, but stamped perfectly once again after all these years! It tickles me to make these treasures new again!
Donna's cards have inspired me forever - thanks once again, my friend!
Monday, April 21, 2025
Washi and a Turnabout!
It's gardening season! From now through June is the best time of year for enjoying our gardens, before they get to the "jungle" stage! Recently I was in the mood for making a turnabout background, but then set it aside until now, when I paired it with some washi florals.
Friday, April 18, 2025
A Card for Easter
My friend Mary Anne sent us a beautiful card for Easter, and I couldn't wait to try and make one, too! Here's my first attempt, using papers from my stash. I think the floral one is Webster's Pages......
Tuesday, April 15, 2025
CASE-ing Joy
My birthday was last month, and I got some gorgeous hand-made cards! Among them was this beautiful one from my friend Joy. I fell in love with it and wanted to make a stab at CASEing it. Here's the result.
Saturday, April 12, 2025
Enjoy the Little Things!
Last year in March I noticed a tiny clump of snowdrops that I had not planted under a Japanese Maple. I've always admired pictures of them, but never got around to planting any. So where did this one come from? I still don't have a clue, but this year it was joined by a 2nd plant nearby, and I'm thrilled to think that someday I may have a clump of these to welcome spring!
So when I saw Simon's Snowbell Bouquet dies, which are snowdrops, I had to bring them home, too. Here's their first outing.
Thursday, April 10, 2025
Spellbinders April Club Kits: Dies, Embossing Folder, and Stamps/Dies
The April Club Kits are now available for new subscribers! The theme this month is Stay in Touch.
Today I have 3 cards. The first two feature the Small Dies, Snail Mail Post. How cute is this idea? I made my little snail into a post mistress - check out her little mailbag!
My last card today combines the Clear Stamps/Dies called Send & Seal with the regular Embossing Folder, Perforated Stamp Edges.
Tuesday, April 8, 2025
Spellbinders April Club Kits: Large Dies, Stencils, Clear Stamps/Die, Glimmer
The Spellbinders Club Kits for April are now available for new subscribers! The theme this month is Stay in Touch, all about letters and postage.
First up today is my card using the Large Dies, Lock & Key Mailbox, with help from the Stencils, Air Mail, and a sentiment from the Clear Stamp kit, Send & Seal.
Sunday, April 6, 2025
April Spellbinders Club Kits: 3D Embossing Folder, Stitching, and BetterPress
The April Club Kits from Spellbinders are here! The overall theme this month is Stay in Touch.
I'll start you out with the unique 3D folder called Postage Mosaic. It's filled with little postage stamps, 17 different designs. You can emboss the whole thing and use it for a background, or you can cut out the individual pieces and put them back together to your liking. My little sentiment banners came from this month's Stitching Kit, Stitched Taking Notes.
Saturday, April 5, 2025
Birthday Card for a Friend
I recently tried out some Brass & Bliss goodies for the first time, taking advantage of their sale on older products. I'm very pleased with their quality! Here's what I made for a friend's birthday.
Thursday, April 3, 2025
Spring Plaids
I was in the mood to make some plaid backgrounds, so I went looking through my own cards for some inspiration.
One nice thing about Blogger blogs is that you can label each post with as many descriptions as you like. Then when you're looking for something, you just type in a label you know you've used before, and - voila! - all those posts pop up for you! (this is only if the blog owner has added a gadget for such a search; mine is over there on the right sidebar: Search this blog.) So I did a search for "plaid" and found a couple examples that I made using an Impression Obsession cling called Painted Stripes. When I used them before, I used just 2 colors, so this time I tried lots of spring colors, and here's my result.
Wednesday, April 2, 2025
Birthday Jubilee
I've been needing to replenish my birthday cards, and the Simon Says Stamp Wednesday challenge pushed me over the edge! It's their 16th birthday, so the challenge is to make some birthday cards. Here's one:
Tuesday, April 1, 2025
Some Postage Collage Cards
Playing with Waffle Flower Postage Collage goodies today, using the main die as a novel background and foregoing the postal details just this once. I have 2 cards.
My first card is inspired by a childhood memory of watching a momma wren teach her babies to fly. It uses a potpourri of supplies from lots of companies; unfortunately, many of them are discontinued. The good news is that you can almost certainly substitute something that is current with a little searching. I really love these birds with the heart wings from an old Wplus9 set.


