Showing posts with label shaped card. Show all posts

Sunday, July 6, 2025

July Spellbinders Club Kits: Mugs, Mittens, and Sweater Hugs!

The Spellbinders Club Kits for July are now available for new subscribers!  This month's theme is Mugs, Mittens, and Sweater Hugs.

The small dies of the month are called Cocoa Greetings, and consist of 18 dies to make some cute mugs.  To begin this month, I made up 3 mugs which you will see being used today and in the next few days with various backgrounds.  I thought I'd show you them all together first.


supplies: Cocoa Greetings dies

As you can see, their hats can double as whipped cream dollops!  There's also a snowflake die in this set.

My first card mixes the Stitching Kit, Frosted Stitch, with the little deer mug above, and the sentiment is from the Glimmer set.


supplies: white, cream, pale peachy pinks, tan, and black cardstock, Frosted Stitch, 3 strands of white embroidery floss, Cocoa Greetings dies, Arctic Glimmer sentiment, silver slimmer foil, adhesive pearls, adhesive foam squares

The deer mug was my favorite of the 3, so I chose these pale peachy-pinks and white for my stitched card to use as a background with it.  It is a really lovely design.  Here it is all alone before I added the mug.  I especially like the 6 dainty snowflakes in the center!  I made this into a shaped card by cutting an extra white shaped base, scoring it about an inch down from the top, then securing that to my stitched panel with strong 1/8" adhesive tape.


supplies: pale peach and white cardstock, Frosted Stitch dies, 3 strands of white embroidery floss, adhesive pearls to match

Next I mixed the Santa mug with the Glimmer kit, Arctic Glimmer, and a sentiment from the Stamps and Dies: Stay Snuggly.


supplies: colored cardstock, Cocoa Greetings Santa Mug, Arctic Glimmer glimmer plate and silver glimmer foil, sentiment from Stay Snuggly stamp/die, adhesive foam square

The Clear Stamps/Dies this month are sentiments to fit this month's theme, plus various snowflakes.  This sentiment is one of the larger ones.  Silver glimmer foil is included in this month's Glimmer kit, and enhances the snowflakes nicely. 

And finally, here is the Penguin mug, along with the Embossing Folder, Frosted Stitch, with another sentiment from the Glimmer kit.


supplies: colored cardstock, Cocoa Greetings Penguin Mug, Frosted Stitch embossing folder, sentiment from Arctic Glimmer 

I'll be back in a few days with the rest of my cards from this new release.

You can look HERE for information on Spellbinders Clubs.  Each is available for new subscribers only from the 6th until the 27th of each month.  If you click on my links under each card, you can see the specifics of each product.  You can subscribe to each of our 10 kits separately, (and you can "unjoin" a subscription at any time without any penalty), or you can get them all, plus a free bonus item each month, and save 60% by choosing the Deluxe Caboodle!

Saturday, March 22, 2025

Birdhouse Shaped Cards for Spring

 Today I'm playing with a pop-up birdhouse die set, and once again I used products from a bunch of companies to complete my projects, so fun!


supplies: colored and kraft cardstocks, a blue woodgrain dp, Scrappy Tails Birdhouse Pop-up dies, Honey Bee Stamps Lovely Layers Dogwood dies, Spellbinders Tweet Cardinal dies, The Greetery Opposites Attract stamp and matching die

The birdhouse set has dies so that you can make your card into a pop-up one.  The birdhouse die is actually quite a bit taller, so that you can make a slim-line card, but I chopped it off at about 6" tall today.  The set gives you options for the opening in it: a circle or a heart.  That was a no-brainer for me!   I haven't played very much with this cute cardinal either, so that was my second choice, and then because of the blue color I chose for the birdhouse, I thought that some neutral cream flowers would look best, so that's where the dogwoods came in.  And I always like to use this sentiment when I make cards that have birds featured.

Here's another one with spring in mind.


supplies: colored cardstock, Honey Bee woodgrain dp, (retired) Distress Grey two-tone woodgrain cardstock, Scrappy Tails Birdhouse Pop-up dies, Pretty Pink Posh Spring Foliage dies, PTI Feathered Friends 2 bird dies, Simon Heart dies

This time I put the sentiment on the back of the card.


supplies: Simon Spring Blessings, Doodlebug enamel heart

These are so much fun I made another version, using the scalloped circle opening this time and yet another bird, colored with markers like a bluebird.  I left the flowers off this time so that I could send this to a guy.


supplies: white and kraft cardstock, Honey Bee Stamps plank design paper, Scrappy Tails Birdhouse Pop-up dies, Tim Holtz Feathered Friends and (retired) Funky Foliage dies, markers to color

Once again, I put my sentiment "Just Because" on the backside of my card.

I'm entering my first card into this month's Double D Challenge: Birds.

Do you enjoy watching the birds?  It's a favorite past-time for us!  We even made a garden devoted to our little visitors!

Thursday, February 8, 2024

Spellbinders February Club Kits: Clear Stamp and Die and Stencils

 The Spellbinders Club Kits are now available, all with a spring/Easter theme!  Today I'm starting with a card I made using the Stamp and Die Kit: Lily Arch.


supplies: white and Surf Blue cardstock, Lily Arch clear stamp and sentiment, and matching die, 2 sizes of Essential Arches

When I looked at this floral image, I though "Easter Lilies", and so the coloring on this card was simple; just a bit of green for the leaves and stems and yellow for the flower centers.  The matching die makes a nice cut, preserving the arch shape, but cutting out enough of the background so that a piece of colored cardstock works for showing off this lovely spray of flowers.

I used an Essential Arch die to cut out the background, and the largest arch of the same set to cut my card base to make a shaped card.  The stamp set has lots of different sentiments, 2 of which are arched, so I chose the Easter one and added it to the top.  

The stencils of the month  this time are 4 different background stencils: Spring Stencil Backgrounds.  Here are 3 of them.  On each card, after doing my stencilling, I used the stencil with an embossing plate and mat to emboss some dimension.


supplies: white, lavender and purple cardstock, Spring Background stencil, 3 shades of purple inks, (retired) Butterfly Dies from a February 2019 large die of the month set: Bonjour


supplies: white and black cardstock, Spring Background stencil, yellows and orange inks, sentiment from Punch & Pierce April 23 Large Die of the Month


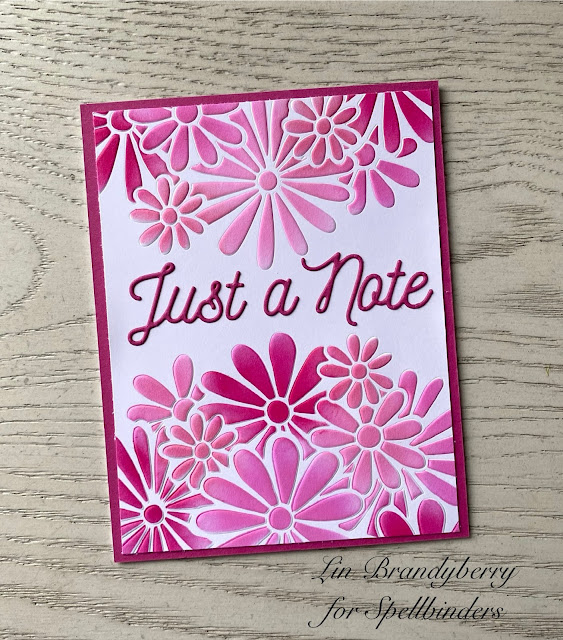
supplies: white and Doll Pink cardstock, Spring Background stencil, Pink Fresh Studio Fairy Dust quad of pink inks, blending brush, Smooth Lines Mix & Match Sentiment

You can look HERE for information on Spellbinders Clubs.  Each is available only from the 6th until the 27th of each month.  If you click on my links under each card, you can see the specifics of each product.  You can subscribe to each of our 10 kits separately, (and you can "unjoin" a subscription at any time without any penalty), or you can get them all and save 60% by choosing the Deluxe Caboodle!  


Sunday, January 7, 2024

Spellbinders Club Kits for January: Large and Small Dies,, Stitching Dies, Clear Stamps and Dies

 The Spellbinders Club Kits for January are now available!  I have 4 cards using 4 different kits - it's all about the birds and the bees!

My first card features the adorable Large Dies of the Month: Honey Bee Jar.  I cut the outermost largest die twice and made a shaped card.  It measures 5" tall (to the top of the gingham cover) by 4 1/4" at its widest point, so it can also be put onto an A2 card base.


supplies: Honey Bee Jar Large dies, various colors of cardstock, Sunny Studios blue gingham dp

This month we also have a little accessory which is the free bonus item included in the Deluxe Caboodle Value Club Membership (see graphic below): a wooden honey dipper! It measures just a tad over 4 1/4" long, and would work nicely with the Honey Bee Jar.


Here are the Small Dies of the Month: Sitting Pretty.


supplies: white, 2 blues, 2 yellows, 2 greens cardstock, Sitting Pretty dies, Branching Out embossing folder, sentiment sticker from Tim Holtz

This makes me think of 2 old friends out shopping who run into each other at the grocery store and stop to have a catch-up!

The Stitching Dies for January are called Bee Stitched.


supplies: aqua, pale grey, black, gold, green, and coral cardstock, Bee Stitched stitching dies, black, gold, and silver metallic embroisery floss, Branching Out embossing folder, Just Bee-Cause sentiment, adhesive foam squares to lift bee

And finally, a card using the Clear Stamps and Dies: Just Bee-Cause.


supplies: white and Surf Blue cardstock, Just Bee-Cause stamps and dies to match, adhesive foam to lift bees

I stamped the half-circle of florals twice to make an oval frame, colored it with markers, then fussy-cut it around the inside and outside edges.  There are dies to match the corners of the florals, and the bees, and most of the sentiments.  I used only the large bee die and popped it above the flowers after attaching them to the card base and stamping my sentiment in the center.

You can look HERE for information on Spellbinders Clubs.  Each is available only from the 6th until the 27th of each month.  If you click on my links under each card, you can see the specifics of each product.  You can subscribe to each of our 10 kits separately, (and you can "unjoin" a subscription at any time without any penalty), or you can get them all and save 60% by choosing the Deluxe Caboodle!  


Thursday, February 7, 2019

Pink Poseys

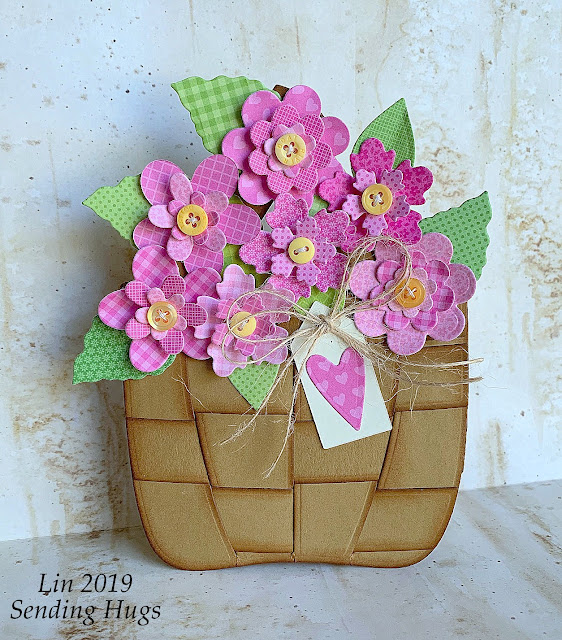
Here's another creation using some of Tammy Tutterow's dies from Crafter's Edge.


supplies: kraft and cream cardstock, lots of pink and green prints from Doodlebug and Sunny Studio paper pads, Vintage Photo distress ink, Tammy's Posey Basket, Posey Flowers Sets 1, 2, and 3, small yellow buttons, natural twine

The Basket die set cuts several pieces so that you can weave your basket.  I die-cut the pieces from kraft and then sponged each of the edges with distress ink to make them show up a bit better.  There are 2 long handles on this basket - for this card they provided a base to attach my flowers, so you don't see much of them.   The little tag and heart are also part of this die set.  I made this into a card by attaching a traced basket shape to the back of my woven basket, scoring the back about 3/4" down from the top and then gluing that section only to the back of my woven basket.  


I filled my basket with some 2- and 3-layer die-cut flowers, mixing up the tiny patterns, and adding little yellow buttons into their centers.  The finished card measures about 4 1/4" wide by 5 3/4" tall, so it will need its own envelope.  But if you bring the flowers down more over the basket, I think you could adjust this design to fit into an A2 envelope.

What a fun project this was to pull together!  These dies are designed primarily for use with fabric or felt, but as you can see, they translate nicely for paper, too.  Thanks for stopping by today.

Wednesday, July 15, 2015

Simon Says.........Get in Shape!

wed-newchallenge-header 

Welcome to another challenge at the Simon Says Stamp Wednesday Challenge Blog!


This week our theme is "Get in Shape", and we'd like you to make something besides the usual square or rectangle for your creation.  My teamies and I are using Lawn Fawn products.  I made a wreath card!

supplies: Lawn Fawn Our Friendship Grows stamp set, lots of yellow, orange, brown and green printed design papers, Simon's Smile Circle die

To begin I cut a doughnut as a base for my wreath from cream cardstock using 2 circle dies.   Then I stamped, cut-out, and paper-pieced the flowers, arranged them and the leaves around the base I had made, and then glued them all down.  My card backing is another cream circle that has been scored close to the top, where it is glued to the wreath.  I tried several stamped sentiments, but in the end, I liked this circle smile the best.  It is 3 layers.  My finished project measures about 5" across at it's widest point.  I used the smaller of the 2 flowers from the stamp set, so it could easily be made larger by using the larger flower, or mixing both of them together.

Here's a more colorful version, and this time I used Lawn Fawn's Scripty Hugs die and my backing is a green print.  Also, most of the flowers come from various Lawn Fawn paper pads, most of them now discontinued.  This is a great way to use up scraps!


Now it's your turn!  We have a $50.00 gift voucher to the Simon Says Stamp store for one lucky random winner of our challenge!

50dollar_voucher_600px

Simon Says Stamp

Do you use Instagram?  If you do, we'd love you to add #ssswchallenge to your challenge entry uploads so we can see them on there, too!

Wednesday, October 31, 2012

Get in Shape

Good morning!  It's time for another fun challenge at the Simon Says Stamp challenge blog!

Simon Says Stamp Challenge Blog

This week our assignment is Get in Shape: we want to see your shaped cards!  Wait until you see what my teamies did this week!  I had fun making a flower pot card, using the colors of the season:


The pot itself is a really easy template, folded at the bottom, and open on the other 3 sides:


I stamped the flower pot with the Hero Arts Envelope Pattern, and after adding the BoBunny rust dot rim, it was wrapped with Natural Twine.  This is how the card is held together.  The flower is made of flowers from Hero Arts Stitched Frame and Layered Flowers.

The insert pulls straight upwards from the pot and is a simple rectangle that is built upwards with a variety of flowers from Hero Arts, stamped on scraps of autumn-colored design papers. The flowers on the insert are from these Hero Arts sets: Big & Small Flowers, Blossom Art, 3 Dotted Flowers, and 3 Leaves.  The sentiments on the pot and the insert are from the same set, Just Find Me.

So, what will you put in our gallery this week?  I can't wait to see!  As always, the generous Heidi has provided a $50.00 gift voucher to the Simon Says Stamp store - will it be yours this week?


I'd like to enter this into the Ribbon Girl October color challenge for this month.  Here's their photo inspiration:


Wednesday, April 11, 2012

Flower Pot card

I've made a card for the April challenge at the Hero Arts Blog.  There are many ways to enter; one of them is to make a shaped card.  I was cleaning out some of my files and came across this pattern for making a flower pot card.


supplies: rust and kraft cardstock, various BoBunny and doodllebug designs dp, Hero Arts flowers stamps and sentiment stamps, twine, buttons

The pot is hinged at the bottom; it has a separate rim, and it's held together with wrapped twine.  There is an insert which pulls out with another sentiment inside.  Here are a couple other photos to show you how it looks separated from the insert:


If you'd like the exact stamps I used, please visit my flickr photostream where I listed them all.  Here is the downloadable template from Andrea Walford that I used for my flowerpot.

I'll also enter this into the Simon Says Stamp challenge: "April Showers Bring Spring Flowers", and also into A Blog Named Hero's "Play Favorites" challenge, as I love all of Hero Arts' flowers..