Here are my favorite cards made in November.

Thanks for stopping by!

Time for another Woodblock Wednesday! This month I chose a PSX stamp with no name, from the year 2000.


I wanted to do another design with my little house sets that was much more clean and simple, so when I saw Rachel's card (2nd one) that I had pinned last year, I decided to CASE it.

Just playing today. This reminds me of an old-fashioned hand-painted pin in times long gone.

Here's a simple card for Thanksgiving, to wish all of my American friends a safe and blessed holiday.

I had lots of fun putting together today's card!


Thank you so much for stopping by today!
I watched Jennifer McGuire's video HERE earlier this week - I don't think I've ever combined a stenciled design with an embossing folder, so here is my first attempt.

Playing once again with the other big word in Tim Holtz's Big Tidings die set, I remembered THIS card that I made in 2015, and decided to try and redo it using this die. Here's the result.

I'm finishing up on making Christmas cards. Here's a clean and simple one that is a fun mix of lots of supplies!

I really enjoy working with Taylored Expressions stencils! Today's cards are made with their Triple Slim Falling for You set and matching Foil-It panels.


supplies: white and orange cardstock, Falling For You stencil set and matching Foil It panel, fall colors of distress inks, sentiment from Impression Obsession (retired) Early Sunsets clear set, copper foil, laminator
For both cards, I started with the Foil It panel and foiled it in my laminator. This gives a sparkle to the skeletons of the leaves. Then I used the matching stencils to color in the details. Each panel was matted on a colored cardstock and the sentiment was stamped or die-cut. I always have fun deciding on which colors of inks will work with each other. Almost anything usually works together - this time I loved the bright cracked pistachio mixed with the hot pink and orange on the first card!
If you enjoy stencilling I highly recommending giving Taylor's stencil sets a try - she has lots of them to pick from!
I was pleased to receive a stamp set and a die set from the new Kaleidoscope Arch Collection, and I made 2 cards with them!


The November Club Kits are now available!
Today I have 2 cards. The first shows you the 3D Embossing Folder: Criss-Cross Motif, with a sentiment from the clear stamps of the month, Sending Sentiments.


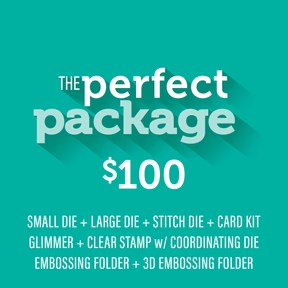
The November Club Kits are now available!
I combined several clubs for my cards today. First up is the Large Dies of the Month: Towering Blooms. The sentiment is one of the set from this month's Glimmer Kit, All You Need Sentiments.


You can look HERE for information on Spellbinders Clubs. Each is available only from the 6th until the 27th of each month. If you click on my links under each card, you can see the specifics of each product. You can subscribe to the kits separately, but there are also lots of ways to combine several of them (scroll down and look under Value Clubs). And you can "unjoin" a subscription at any time without any penalty.


Last year I made these 2 card fronts but never finished them into a card. They were waiting for me in my fall bin of supplies this year. So I found some sentiments for them and put them onto a card base. Both started with Taylored Expressions "foil it" panels.


I have slowly been collecting little house dies and I currently have several sets of them, plus a Tim Holtz cover die. Amazingly, they are all sized so that they can be mixed and matched! I've seen lots of winter scenes using them, but not many ones for fall, so here's my contribution to that category. I was envisioning a New England village.

I realized that the Spellbinders Sealed floral and leafy sprigs would be a great match for Papertrey Ink's Tuck It stamps and dies, so last month when there was a great sale at Spellbinders, I scooped up a couple of the older Sealed sets and had a play.
