Showing posts with label Honey Bee. Show all posts

Wednesday, August 27, 2025

Woodblock Wednesday!

 It's Woodblock Wednesday!  This month I chose this 2014 beauty from Penny Black.


supplies: white, black, and peachy pink cardstock, a text dp, Penny Black Hollyhocks stamp, saltwater taffy, mustard seed, and mowed lawn distress inks, water, Honey Bee Bitty Buzzwords Hello die, stamped sentiment from (retired) Wplus9 Hand Lettered Hello, Spellbinders (retired) Deckle Edge die, Sunny Studios Quilted Hearts embossing folder, adhesive foam squares


Usually I'd make this a flat card, but today I popped the flowers above everything else.  The sentiment was stamped before I embossed the card front, then I layered on everything else.  The image was watercolored simply with distress inks diluted in water.

You can see more cards using woodblock stamps at Amy's blog HERE.


Monday, April 28, 2025

Sunny Thoughts

 Once upon a time, not so long ago, there was a challenge blog named The Play Date Cafe.  One of my favorite recurring challenges there was called "Black and White and a Splash". Here's a card inspired by that challenge.


supplies: white and bright yellow cardstock, Winnie & Walter (retired) Audrey's Cutaways scalloped rectangle, Honey Bee Stamps Daisy Layers Bouquet stamps and matching stencils, yellow inks, a Simon reverse sentiment strip, adhesive foam 

The stamp set includes 2 stamps, the large one which makes the full bouquet, and a smaller one which duplicates most of the flowers in it.  I stamped each of them on white card, then colored in the smaller with the matching stencils and 4 yellow inks.  This sentiment strip continues the black and white theme, but it's nice and skinny so that it doesn't cover up much of the design!

Wishing you a sunny day!

Saturday, April 5, 2025

Birthday Card for a Friend

 I recently tried out some Brass & Bliss goodies for the first time, taking advantage of their sale on older products.  I'm very pleased with their quality!  Here's what I made for a friend's birthday.


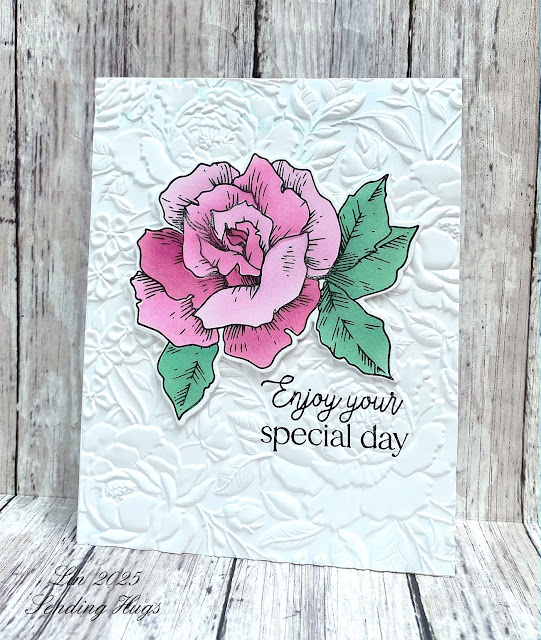
supplies: white cardstock, Brass & Bliss Someone Like You rose, matching stencils, and die, Simon Trio 12 pinks, Dublin green inks, Honey Bee Stamps Daisy Layers stamp sentiment, Spellbinders Floral Expressions 3D folder

I knew I wanted to keep the design fairly simple, so I went looking for an embossing folder for the background; isn't this one perfect with it's large florals?  I used a Jen McGuire trick and cut out 2 more plain die-cuts to layer behind the colored one to save on using adhesive foam, which I go through like there's no tomorrow!  

I'll enter this into this week's Simon Says Stamp Wednesday Challenge: Birthdays.

How is your day going?  Hope it's a good one.  Thanks so much for stopping by today!

Saturday, March 22, 2025

Birdhouse Shaped Cards for Spring

 Today I'm playing with a pop-up birdhouse die set, and once again I used products from a bunch of companies to complete my projects, so fun!


supplies: colored and kraft cardstocks, a blue woodgrain dp, Scrappy Tails Birdhouse Pop-up dies, Honey Bee Stamps Lovely Layers Dogwood dies, Spellbinders Tweet Cardinal dies, The Greetery Opposites Attract stamp and matching die

The birdhouse set has dies so that you can make your card into a pop-up one.  The birdhouse die is actually quite a bit taller, so that you can make a slim-line card, but I chopped it off at about 6" tall today.  The set gives you options for the opening in it: a circle or a heart.  That was a no-brainer for me!   I haven't played very much with this cute cardinal either, so that was my second choice, and then because of the blue color I chose for the birdhouse, I thought that some neutral cream flowers would look best, so that's where the dogwoods came in.  And I always like to use this sentiment when I make cards that have birds featured.

Here's another one with spring in mind.


supplies: colored cardstock, Honey Bee woodgrain dp, (retired) Distress Grey two-tone woodgrain cardstock, Scrappy Tails Birdhouse Pop-up dies, Pretty Pink Posh Spring Foliage dies, PTI Feathered Friends 2 bird dies, Simon Heart dies

This time I put the sentiment on the back of the card.


supplies: Simon Spring Blessings, Doodlebug enamel heart

These are so much fun I made another version, using the scalloped circle opening this time and yet another bird, colored with markers like a bluebird.  I left the flowers off this time so that I could send this to a guy.


supplies: white and kraft cardstock, Honey Bee Stamps plank design paper, Scrappy Tails Birdhouse Pop-up dies, Tim Holtz Feathered Friends and (retired) Funky Foliage dies, markers to color

Once again, I put my sentiment "Just Because" on the backside of my card.

I'm entering my first card into this month's Double D Challenge: Birds.

Do you enjoy watching the birds?  It's a favorite past-time for us!  We even made a garden devoted to our little visitors!

Tuesday, March 4, 2025

Spring Blessings

 Here's a mix of Honey Bee Lovely Layers dies and a Spellbinders embossing folder and sentiment.


supplies: white, soft aqua, green, pale yellow, and 4 different kraft cardstocks, Honey Bee Stamps Lovely Layers Dogwood, Lovely Layers Nest, Spellbinders (retired) Branching Out embossing folder, (retired) sentiment from Lily Arch

I really enjoyed making this card - as their titles suggest, the florals and the nest are composed of many layers, and I added another with the leafy embossing folder background.  After all that, I liked this sweet little sentiment to finish things off.

I hope we get to see this for real soon!  

Monday, February 24, 2025

Floral Thank You

 Today I'm using a stencil set from Honey Bee stamps that was designed for the holiday season.  It includes 2 large floral designs that I think will work year-round.  


supplies: white cardstock, My Favorite Things pink and green plaid design paper, Honey Bee Stamps Floral Noel stencils, Altenew Lime and Cherry Blossom mini inks,  Penny Black Stitched Stackers dies, Pink Fresh Studio Perfect Sentiments stamp and die, Spellbinders Berry color essentials gems

I've used this sketch before, several years ago, and I like the bit of plaid peeking out and the subtle edging on the smaller panels.  

Thanks for stopping by today - hope your day is going well! 

Sunday, December 22, 2024

Floral Noel

I took advantage of some Black Friday sales this year; one of the sets I got was the Honey Bee Stamps Floral Noel suite: layering stencils, matching dies, and stamps.  Here are 2 cards I made recently with my new goodies.


supplies: white cardstock, old Susan Branch holly design paper, Honey Bee Stamps Floral Noel stencils, twisted citron, mowed lawn, abandoned coral, and festive berries distress inks, Floral Noel dies, sentiment from Floral Noel stamp set, small adhesive foam squares, tiny rhinestone gems

The stencils also include larger versions of the flower sprigs, and the dies also include a smaller version of both Noel and Joy.  Here's what I did with some of those.


supplies: white and matte metallic gold cardstock, Floral Noel stencils, Floral Noel dies, Spellbinders Floral embossing folder, Pink Fresh Stitched Scallop Rectangle die, tiny gold gems 

Everything was easy to work with, and I'm so glad I was able to add them to my collection!  Once again, I'll add these to the current Simon Says Stamp Wednesday Challenge, to use dies.

Thank you for coming by today - hope I've inspired you in some small way!

Wednesday, November 27, 2024

A Thanksgiving Bouquet

 I haven't used this Honey Bee Stamps Fall Bouquets die set in awhile, so I pulled it out again for a Thanksgiving card.  This will serve as my greeting to any of you who may stop by over the holiday - Happy Thanksgiving!  


supplies: colored cardstock, woodgrain background from Honey Bee Grain and Grunge pad, Fall Bouquets dies, sentiment from (retired) 2014 SSS Autumn Blessings, cream embossing powder, adhesive foam squares

I hope you have a lovely day; it's probably the last holiday here that hasn't become too terribly commercialized, and we can enjoy it as it's meant to be.  

Thursday, September 26, 2024

Woodblock Wednesday

 My card for this month's Woodblock Wednesday uses a favorite big woodblock stamp with a favorite motif for this time of year, a wreath.


This is Autumn Words, from Stampendous, dated 2012.


supplies: white and kraft cardstock, Stampendous Autumn Words, VersaMark ink and white embossing powder, peacock feathers distress ink, The Greetery Rustic Wreath Basic dies, Rustic Wreath Twigs dies, Honey Bee Fall Bouquets leaves and acorns, Spellbinders berry branches, finger daubers, fall colors of distress inks

After embossing the Words stamp on white, I diluted some peacock feathers distress ink and painted it across the panel to bring out the words.  Then I constructed my twig wreath and embellished it with leaves, berries, and acorns sponged with distress inks.

You can see all the other entries at Amy's blog HERE.


Saturday, September 21, 2024

Pink Fresh Studio September Challenge

 I came across this challenge earlier this month and couldn't resist the opportunity to make a wreath.  


supplies: ivory and various challenge colors of cardstock, Pink Fresh Curvy Leaves die, enamel dots in challenge colors, Bitty Buzzword sentiment dies, Pinpoint Leaf cover plate, adhesive foam

The challenge this month is to make a wreath or use leaves, and I also took it as a challenge to use the colors they posted.  I used their smallest Curvy Leaves die to make my wreath, and added more color with some enamel dots. I love when I can use older supplies to make a brand new design!    


Thanks so much for stopping by today!

Wednesday, May 15, 2024

Dogwood and Bluebirds

 A few weeks ago, I looked out my front window and saw just this scene!  The dogwoods had just opened and there sat a male bluebird looking straight back at me!  I wasn't fast enough to get a real picture, but I've got it in my mind, and this will commemorate that moment.  

I get so excited about bluebirds now because it's taken them 50 years to appear in our backyard here in NE Ohio, and there is nothing else like them!  Every year now for the past 2 or 3 years, they build a nest in one of our birdhouses, and have at least 2 broods.  It's fun to see them flitting back and forth across the backyard - a dazzling streak of beautiful blue!

I needed a thank you card for Mother's Day, and here it is.


supplies: white, Surf Blue, chocolate, pale and bright green, pale orange, medium and dark blue cardstock, Honey Bee Lovely Layers Dogwood dies, Spellbinders Sweet Birds on a Branch dies, Pink Fresh Studio Perfect Sentiments stamp and die, adhesive foam squares to pop up birds

These dogwood dies are a lovely size and go right along in scale with the darling little birds. 

Thanks for your visit today - hope you'll come back again!

Friday, January 12, 2024

Friendship Frames

 Here's another stamp and matching stencils set that I scooped up last year during some Black Friday sales.  They're Honey Bee Stamps, called Friendship Frame.  You know me and wreaths!  I made 2 cards with them.


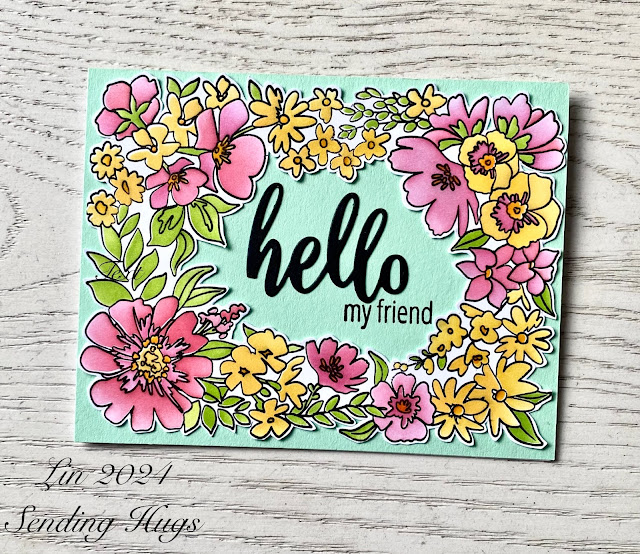
supplies: white, black, and Mint cardstock, Honey Bee Friendship Frame clear stamp and Friendship Frame layering stencils, Altenew mini inks, blending brushes, unknown hello die (maybe Winnie & Walter?), stamped sentiment from (retired) Avery Elle Simply Said Hello

After stamping and using the stencils to color the frame, I tried different colors for my background, and this time Mint won the day.  I'm sure there's a set of dies to match, but I enjoyed fussy-cutting out the floral.

My 2nd card is in aquas and purples against white and I turned it to a portrait.


supplies: white cardstock, Honey Bee Friendship Frame clear stamp and Friendship Frame layering stencils, Altenew mini inks, blender brushes, Taylored Expressions (retired) Handlettered Sentiments cling stamp

This frame fits snugly on an A2 panel, so this time I stamped and stencilled, then attached my finished panel to a card blank.  

You may or may not have noticed some small changes here on my blog since the first of the year.  That's because we are snow-birding here in Florida for a few months.  As a result, I'm using my husband's laptop and my iphone for editing my pictures and adding a watermark.  I'm pretty proud of myself that I was able to make the changes with a minimum of drama - I DO still have some brains!!

One thing that I didn't bring down here was accessories, like enamel dots, which would have been nice on both of these cards.  I see a trip to the local scrapbook store in my future!!

Thanks for stopping by today - hope your day is a good one!

Tuesday, November 14, 2023

Joy to the World

 I'm finishing up on making Christmas cards.  Here's a clean and simple one that is a fun mix of lots of supplies!


supplies: white and Schoolhouse Red cardstock, a scrap of red checked dp, Tim Holtz Big Tidings Joy dies, sentiment from The Greetery Opposites Attract Holiday stamps, leaves and berries from Taylored Expressions Wreathed in Joy stamps, stencils, and die, Honey Bee Pierced Fancy Flakes cover plate, adhesive foam to lift central motif

I wanted to see if the small wreath from Wreathed in Joy would work where the "O" is in Joy, and unfortunately it won't.  But I had previously stamped and stencilled these leafy berry sprigs from that same wreath set, and thought I could try to use them to accessorize the word.  I think they play nicely together, and here is what resulted!  

This card would be fairly easy to make in multiples, also.  

Thanks for stopping by today.

Sunday, November 12, 2023

Mini Slimline Thanksgiving Cards

 I really enjoy working with Taylored Expressions stencils!  Today's cards are made with their Triple Slim Falling for You set and matching Foil-It panels.


supplies: white and fuschia cardstock, Falling For You stencil set and matching Foil It panel, picked raspberry, carved pumpkin, cracked pistachio and vintage photo distress inks, Honey Bee Bitty Buzzwords sentiment dies, gold foil, laminator

supplies: white and orange cardstock, Falling For You stencil set and matching Foil It panel, fall colors of distress inks, sentiment from Impression Obsession (retired) Early Sunsets clear set, copper foil, laminator

For both cards, I started with the Foil It panel and foiled it in my laminator.  This gives a sparkle to the skeletons of the leaves.   Then I used the matching stencils to color in the details.  Each panel was matted on a colored cardstock and the sentiment was stamped or die-cut.  I always have fun deciding on which colors of inks will work with each other.  Almost anything usually works together - this time I loved the bright cracked pistachio mixed with the hot pink and orange on the first card!

If you enjoy stencilling I highly recommending giving Taylor's stencil sets a try - she has lots of them to pick from! 

Saturday, August 12, 2023

Wreathed in Joy

 Taylored Expressions brought out a Christmas kit late last month which I couldn't wait to receive!  Today I have 3 cards made from the elements in the kit.  The kit consists of 2 sizes of wreaths, with layering stencils to match, some extra sprigs (which I didn't use today), and the letters "J" and "Y", plus dies to cut everything out.  The set is engineered very efficiently, as there is 1 large 6" cling stamp to stamp all the elements, then 3 stencils which get layered on next, and finally dies that will cut everything out.

First I made a card with the largest wreath, adding an old sentiment die.


supplies: white and Lipstick Red cardstock, white plank patterned paper, Wreathed in Joy cling stamp, matching stencils, and die, Hero Arts Latte, distress inks in twisted citron, mowed lawn, and candy apple inks, Penny Black (retired) Nature's Best sentiment die, Spellbinders Hemstitch Rectangle die, adhesive foam squares

I like finding old supplies that will  work with brand new goodies, and all 3 of my cards are a mix of this new kit and older elements.  Next I used the smaller wreath from the first stamping and stencilling, putting it over an embossed background, and popping the wreath up.


supplies: same papers and inks as above, The Greetery Opposites Attract Holiday sentiment, and Spellbinders (retired) Holly Flourish embossing folder, adhesive foam squares

These same dies can also be used for a portrait orientation, if you bring everything a bit closer together.


supplies: white cardstock, Wreathed in Joy kit, latte ink, evergreen bough, pine needles, and picked raspberry distress inks, a Hero Arts sentiment stamp, Honey Bee Pierced Fancy Flakes cover plate, Lawn Fawn Fancy Scallop Rectangle die

I'm looking forward to making more Christmas cards with this fun set - the sky's the limit!  I hope you'll give this kit a look, too!

Thursday, June 8, 2023

Love You

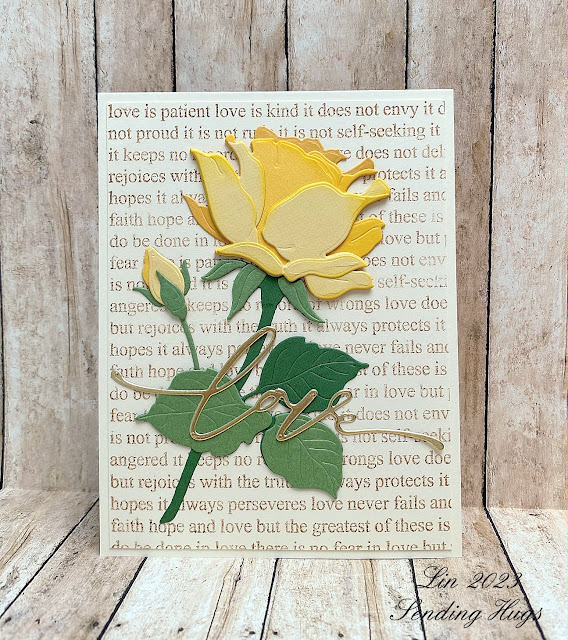
 Our 52nd anniversary was earlier this week, and I wanted to share the card I made for my husband this year.  I carried yellow roses on our wedding day.


supplies: Cream, Bazzill Gumdrop green, Green Leaf, several yellows, and Matte Gold cardstock, Simon Love Is Background cling, Vintage Photo distress ink, Honey Bee Lovely Layers Rose, The Greetery Love die

This lovely rose die has almost too many layers - I used 6 of them for the main flower, with 3 colors of yellow cardstock. 

Thanks for coming by!

Sunday, June 4, 2023

Daisy Layers - Spring, Summer, and Fall

 I fell in love with these Honey Bee Stamps Daisy Layers, and finally got them home to play with!

First I used the stamps and the matching stencils together.


supplies: white cardstock, Honey Bee Daisy Layers stamp set and matching layering stencils, Pink Fresh Studio Fairy Dust pinks and Rise and Shine yellow mini ink cubes, mowed lawn distress ink, sentiment from Tammy Tutterow/Spellbinders (retired) Happy Grams cling stamp and die, Lawn Fawn Fancy Scallop Rectangle die, adhesive foam squares

I like the combination of this pretty spring bouquet with the lacey edging!  

Next I switched to fall colors and used alcohol markers to color the stamped images.  There is a 2nd bouquet of fewer daisies, no greenery, that duplicates the larger image.  That can be cut out and lifted above the main image for dimension, so I did just that, lifting the layers with foam, then adding a simple birthday sentiment.  And I used a different edging die this time, too.


supplies: white and pumpkin cardstock, Honey Bee Stamps Daisy Layers stamp set, Pink Fresh Studio Folk Edge Rectangle die, sentiment from a retired Simon set called Birthday Flowers, adhesive foam squares

It's nice to have the stencils when you want a quickly colored design, but I also enjoyed the freedom of coloring the flowers and greenery with markers to get more colors into the design.

And one more time, really simple this time, making the daisies white for a summer card.


supplies: white and Audrey Blue cardstock, vellum, Daisy Layers flowers and sentiment, alcohol markers in various greens and a pale grey, yellow enamel dots, Simon (retired) Detail Ringlets cover plate

I used both floral stamps once again for this card, fussy-cutting them both so that I could add the bouquet to the pierced quilt pattern on a blue panel for my background.  The sentiment is one of many from the stamp set - I liked the mixed font.

No matter how you treat this, this is a gorgeous design!  Thanks for coming by today.

Monday, May 1, 2023

Pink Dogwood on Plaid

Happy May!!

Playing still with some plaid backgrounds that I made earlier this spring.  I paired this one with a branch of pink dogwood.

supplies: white, kraft, Cotton CandyBanana, and Green Apple cardstock, vellum, (retired) Tammy Tutterow plaid stencil, (retired) Winnie and Walter Scenery Stripes and Kitchen Sink Gingham and Plaid stamps, spun sugarsqueezed lemonade and vintage photo distress inks, Honey Bee Stamps Lovely Layers Dogwood dies, Spellbinders scallop oval die, sentiment from Newton's Nook Little Liliesmicrodot adhesive

I cut 2 layers of the scallop oval from vellum to serve as my base for the dogwood branch, and to dull the background there a bit.  Microdot adhesive held everything together.  

Thanks for stopping by today! 

Monday, April 24, 2023

Ever in Bloom

Taylored Expressions has perfected a wonderful concept: layering stencils, called Quads, which can make 4 cards at one time, because the stencils are 8 1/2 X 11"!  I love Taylor's designs, and she's hit it out of the park with this idea!

Here is my first play with her newest Ever in Bloom stencil set.


I started with a piece of 8 1/2 X 11" white cardstock, then systematically layered the 4 stencils, using these inks: Simon Says Stamp Teeny Bikini, Melon, Duckling, Altenew Lime, and vintage photo distress ink.  Then I trimmed out each panel to a little less tha A2 size and framed each with a colored cardstock: kraft, Cotton Candy, a darker pink, and Green Apple.  Then I chose a stamp or die to fit each.  Here are the individual cards:


supplies: sentiment from Honey Bee Bitty Buzzwords dies, cut from a dark brown cardstock and shadowed with vellum


supplies: stamped sentiment from Taylored Expressions Handlettered Sentiments cling stamps, stamped in Altenew Dark Chocolate ink


supplies: Simon Just Miss You sentiment, Dark Chocolate ink

supplies: Avery Elle Loads of Wishes sentiment, Dark Chocolate ink 

HERE's a link to more of these Create-in-Quads sets.  If you love layering stencils, you will love these!  I can't wait to try some other color combinations!

Wednesday, April 19, 2023

Simon Says......Things with Wings


Welcome to the new challenge at the Simon Says Stamp Wednesday Challenge!


This week the theme is "Things with Wings"!  The team is featuring Honey Bee Stamps products.  You don't have to use this brand to play along, but if you have any of their products that would work, we'd love to see them!


supplies: white, green, kraft, and Cotton Candy cardstock, Honey Bee Lovely Layers Coneflower dies, Simon You Shine butterfly and Friendly Flowers sentiment stamps, markers to color

I used markers to shade my pink cardstock for the flower, and the same markers to color my stamped butterfly.

Now it's your turn!  We have a $25.00 gift certificate 


to the amazing Simon Says Stamp store for 1 lucky random winner of this week's challenge!