Showing posts with label cover plate. Show all posts

Friday, April 24, 2026

Just a Note

 It is such a joy to play again with The Greetery's Petal Pusher suite!  This time I used all 3 parts: the cover die, the matching stencils, and the matching dies.


supplies: white and rose pink cardstock, The Greetery Petal Pusher cover die, stencils, and Petal Pusher Blooms dies, distress inks in wilted violet, kitsch flamingo, mustard seed, twisted citron, and mowed lawn, Simon Hurley Must-Have Sentiments foiling plate/die, gold foil

The cover plate cuts out the design, leaving the flowers and leaves attached so that they can be pulled up for dimension.  I did just that with all the pink flowers, and then used some of the matching dies to add an extra layer to the purple flowers.  

The cutting plate also cuts out the tiny dots in the background, and this time I chose a rose pink color to back it with and to bring in some more pink to the design.  This is such a pretty design that I never want to cover up any of it with a sentiment, but this small one from Simon Hurley was just right.  I popped it up with adhesive foam so that it didn't get lost.  

I used some softer inks for a spring feel.

This is putting me in the mood for shopping for some baby flowers!  The best time of year is almost here!

Wednesday, January 14, 2026

SnowDrops!

Hello!  Long time no see!  How was your Christmas? 

Ours was magical!  We thoroughly enjoyed being with our kids and grands and can't wait to do it again.  They all left by New Year's Eve, and then the de-decorating took some time, but I think we're back to normal now.  It's been strange not working on cards everyday, but I've substituted some reading and doing online jigsaw puzzles.  But in my mind I've been thinking about what I'd like to make for my first card for this year.

Our weather has been all over the place since last we were together, anywhere from the frozen tundra and a decent amount of snow to balmy 60 degrees.  In years past we'd be in sunny Florida for the winter months, but those days may be no more, so I decided to find beauty in what I'm given.  

I thought these sweet little snowdrops reflected the season nicely.


supplies: white, aqua, and green cardstock, retired Honey Bee Stamps Pierced Fancy Flakes cover plate die, tumbled glass ink,  Simon Says Stamp Snowbell Bouquet and Pretty Bows dies, and a sentiment from a retired Spellbinders stamp/die set called Sending Sentiments, Audrey Blue ink

That sentiment will work for lots of occasions, I think.

Thanks for stopping by today.

Saturday, August 30, 2025

Take Care Wreath

 I went diving into my scrap basket again and here's what resulted this time.


supplies: white, dark green, and pink cardstock, vellum, Pink Fresh Studio Stitches Background cover plate, Blossoms & Berries washi wreath, Take Care die, circle die, enamel dots

Everything is retired, but each is easily replaced with one of your favorites.

Can you believe we're heading into September in a few days?  Since I love fall, that's just fine with me; we're already seeing fall temperatures here; it's was just too hot for me this summer!  What's it doing in your neck of the woods?

Tuesday, August 12, 2025

A Heart Card

 Here's a card made with an old favorite Paper Smooches stamp set called Best Buds.  It has several pretty floral motifs in it, one of which is this sweet banner with a selection of sentiments to go inside.


supplies: white and coral cardstock, (retired) Best Buds banner, Tammy Tutterow (retired) Prim Hearts die, Simon Says Stamp Detailed Ringlet cover plate, adhesive foam squares

After coloring and cutting out the banner, I decided I'd put it over a heart-shaped window.  This prim heart die by Tammy Tutterow/Spellbinders is a nice shape for a rectangle card, and is just a bit different from the usual hearts we all have, longer and skinnier.  After cutting it out of my trimmed white panel, I debated about using an embossing folder, and finally settled on this very subtle cover plate that adds just enough interest.

Hope you're having a good day - thanks so much for stopping by today!

Sunday, June 22, 2025

Elegant Rose

I couldn't resist this set of stencils from Simon's April release, You Are My Favorite, especially after seeing Heather's idea using them mixed with embossing folders. I needed 2 cards for anniversaries this month - here's the one I made for my husband - it was 54 years this year!


supplies: white, yellow, and cream cardstock, Simon Elegant Rose stencil set, squeezed lemonade, mustard seed, fossilized amber, and mowed lawn oxide inks, sentiment from Waffle Flower Sweet Lattice Sentiments, an unknown heart embossing folder

Heather embossed her blank panel first, then stencilled it, and I did the same, using oxide inks.  Doing it this way vs. the reverse makes you work a little harder to get the color down, but I love the results!  This design is so large that all you need is a sentiment.  

Next I made another card in coral inks for our son and daughter-in-law.  This time I used a pierced cover plate that leaves a much smoother surface on which to stencil, smooth enough to stamp the sentiment at the end.


supplies: white and coral cardstock, Elegant Rose stencil set, spun sugar, saltwater taffy, abandoned coral, and mowed lawn oxide inks, sentiment from (retired) Tammy Tutterow/Spellbinders Tiny Sentiments, Simon Detailed Ringlet cover plate, tiny heart sprinkle

This is a lovely design, easy to line up, and will work for so many occasions!

Thank you for coming by today.

Sunday, May 25, 2025

Just a Note

 I've used this sketch before, but with all stamping.  Today I thought I'd play with a favorite floral layering die set.


supplies: white, shades of aqua, yellow, and green cardstock, Altenew Mini Flower Cluster dies, The Greetery Opposites Attract sentiment, Lil Inker (retired) Circles and Diamond Stitched Pattern cover plate

After assembling my floral cluster, I trimmed down some white cardstock and stamped my sentiment, then used the cover plate over that.  Then I matted the panel, attached it to my card base, and added the flowers.  

These posies have always made me think of flowering fruit trees, but today I chose to make them blue.

Can you believe June is almost here?!  It's still on the chilly side here, and my husband thought we had a light frost a few nights ago!  Still, I'd rather this than the dive into summer temps we've had some years.  We are enjoying a nice slow unfolding of our gardens this year.

Friday, May 2, 2025

Birthday Cards from the Garden

 Time to replenish my birthday card stash, so I pulled out this favorite Hero Arts Flower Garden fancy die and made a couple cards.


supplies: black and white cardstock, Hero Arts Flower Garden cover die, markers, Simon Painted Happy Birthday dies, irridescent gems

I have used this cover die lots and lots, but not with a black background until today; I am always astounded how much the colors pop against it!  I layered the sentiment 3 times to make it stand out against all the busy-ness behind it.

Here's another one, going pastel this time.


supplies: white, yellow, pink, lavender, and green cardstock, Flower Garden cover plate, My Favorite Things (retired) Stitched Mini Square Square Stax die, sentiment from Waffle Flower Sweet Lattice Sentiments, adhesive foam squares

For this card, I cut the Flower Garden twice, attaching the first one to my pieced pastel backing, then cutting the 2nd one apart and coloring it to match the backing colors.  I attached the floral clusters to my sentiment square, then popped the whole thing above the card front.

It's amazing how different these cards can look!  That's why I love this cover die so much!

Thanks for stopping by - have a wonderful day!

Tuesday, March 18, 2025

Petal Pushers

 Here's a beautiful set of goodies from The Greetery that needs some love.  I used some pretty pastel colors for spring.


supplies: white and mint cardstock, The Greetery Petal Pusher Background plate and matching stencils, Pink Fresh Studio Sparkling Rose, Lemon Whip, and Sky Blue, Altenew Sweet Leaf mini ink cubes, gems and glittery stickers in flower centers

This cover plate cuts out the design as you see it, but the flowers and leaves are not cut all the way through; you can pull up their edges for dimension while the centers remain attached.  The 5-piece stencil set  colors everything.  

It turned out so pretty I didn't want to cover up anything with a sentiment, so I've left that off for now. 

This satisfied my need for spring for at least 1 happy afternoon!  Hope it makes you smile, too!

Saturday, May 18, 2024

Delicate Garden

 I've been lusting after this Delicate Garden Craft Your Life set for a year now, and I finally caught it on sale earlier this month!  Here are some cards I made using this wonderful set.


supplies: white cardstock, dps from Whimsy Stamps Mix-n-Match 2 pack, Delicate Garden embossing folder, stencils, and matching die, Altenew Cherry Blossom, Pocketful of Sunshine, and Green Valley inks, Pink Fresh Studio Perfect Sentiments stamps and die

First I used the embossing folder to emboss this image, then the stencils to color it, and finally the matching die to cut it out.  Then I ran it through the folder again to refresh and deepen all the details.  I love dots and stripes, and this paper pack is a great one that has both!  There is a stamp set also in this set, but when using the embossing folder, I don't think you need it.  

The stamp set, stencils, and dies have 2 more floral arrangements in this set.  They are often used together with the above image, but today I wanted to let them shine on their own.


supplies: white and purple cardstock, Delicate Garden stamp, stencils, and die, Altenew Enchanted Garden purples and Green Meadows greens inks, Spellbinders Hemstitch Rectangle die, Simon Blossom Field embossing folder, Spellbinders All You Need Sentiments glimmer plate and die, Lavender Petal glimmer foil


supplies: white, lemon yellow, and black cardstock, Delicate Garden stamp, stencils, and die, Altenew Pocketful of Sunshine yellows, Golden Sunset oranges, and Spring Bouquet greens inks, Pink Fresh Studio Floral and Diamond Tiles coverplate, Spellbinders Curved Everyday Sentiments glimmer plate and die, gold glimmer foil

This is certainly a set that gives you your money's worth!  I love sets like these that give you lots of products that all coordinate.

Thanks for stopping by!

Wednesday, February 14, 2024

Happy Valentine's Day!

Today is one of my favorite holidays, so I had to have a card to post.  


supplies: white cardstock, Simon Says Stamp (retired) You Have My Heart heart wreath stamp, Hero Arts (retired) Celebrate Everyday sentiment, Memory Box Pinpoint Leaf cover plate, adhesive foam squares

Once again, sorry to say, most of these supplies are retired.  I stamped and cut out another little bunch of roses to add to the bottom left of the wreath, just to spread some more color around.

This year I didn't make as many Valentines as I usually do - I only brought a few stamp sets here to Florida, and forgot all the beautiful heart dies at home.  This stamp set is one of my all-time favorites, and I'm glad I have it.  

Hope you have a lovely day!

Wednesday, January 24, 2024

Petal Pushers!

 Here's a suite of products that the Greetery released last year.  I had such fun when I first got these that I wanted to repeat the process.  They're called Petal Pusher.


supplies: white, pink, and pale aqua cardstock, Petal Pusher background die and matching layering stencils, Altenew Four Scoops and Frayed Leaf inks, blending brushes, sentiment from Spellbinders Pocketful of Spring kit

The background die cuts out the edges of most of the flowers and leaves, leaving the centers intact so that you can pull them up for dimension.  The other thing that appeals to me is the many tiny dots in the background that pop out so that you can line the panel with another cardstock color, in this case a pale aqua.  Maybe the only drawback to this design is that it's so packed full of detail that there's not much room for a sentiment!  I chose a tiny strip for mine this time.

HERE is a blog post from last July when I first got this suite, that has 3 more cards using these elements.  I have yet to use the dies only - that's my next project!

Thanks for stopping by - enjoy your day!

Tuesday, November 14, 2023

Joy to the World

 I'm finishing up on making Christmas cards.  Here's a clean and simple one that is a fun mix of lots of supplies!


supplies: white and Schoolhouse Red cardstock, a scrap of red checked dp, Tim Holtz Big Tidings Joy dies, sentiment from The Greetery Opposites Attract Holiday stamps, leaves and berries from Taylored Expressions Wreathed in Joy stamps, stencils, and die, Honey Bee Pierced Fancy Flakes cover plate, adhesive foam to lift central motif

I wanted to see if the small wreath from Wreathed in Joy would work where the "O" is in Joy, and unfortunately it won't.  But I had previously stamped and stencilled these leafy berry sprigs from that same wreath set, and thought I could try to use them to accessorize the word.  I think they play nicely together, and here is what resulted!  

This card would be fairly easy to make in multiples, also.  

Thanks for stopping by today.

Saturday, August 12, 2023

Wreathed in Joy

 Taylored Expressions brought out a Christmas kit late last month which I couldn't wait to receive!  Today I have 3 cards made from the elements in the kit.  The kit consists of 2 sizes of wreaths, with layering stencils to match, some extra sprigs (which I didn't use today), and the letters "J" and "Y", plus dies to cut everything out.  The set is engineered very efficiently, as there is 1 large 6" cling stamp to stamp all the elements, then 3 stencils which get layered on next, and finally dies that will cut everything out.

First I made a card with the largest wreath, adding an old sentiment die.


supplies: white and Lipstick Red cardstock, white plank patterned paper, Wreathed in Joy cling stamp, matching stencils, and die, Hero Arts Latte, distress inks in twisted citron, mowed lawn, and candy apple inks, Penny Black (retired) Nature's Best sentiment die, Spellbinders Hemstitch Rectangle die, adhesive foam squares

I like finding old supplies that will  work with brand new goodies, and all 3 of my cards are a mix of this new kit and older elements.  Next I used the smaller wreath from the first stamping and stencilling, putting it over an embossed background, and popping the wreath up.


supplies: same papers and inks as above, The Greetery Opposites Attract Holiday sentiment, and Spellbinders (retired) Holly Flourish embossing folder, adhesive foam squares

These same dies can also be used for a portrait orientation, if you bring everything a bit closer together.


supplies: white cardstock, Wreathed in Joy kit, latte ink, evergreen bough, pine needles, and picked raspberry distress inks, a Hero Arts sentiment stamp, Honey Bee Pierced Fancy Flakes cover plate, Lawn Fawn Fancy Scallop Rectangle die

I'm looking forward to making more Christmas cards with this fun set - the sky's the limit!  I hope you'll give this kit a look, too!

Saturday, July 8, 2023

Petal Pushers!!

The Greetery recently had a new release, among which was a suite of products called Petal Pushers!  The suite includes a very detailed cover plate, a set of layering stencils, and floral dies to match.  I made 3 cards today.

First, I combined the cover die and the stencil set.


supplies: white, yellow,  and Audrey Blue cardstock, Petal Pushers cover die and stencil set, Altenew mini inks in purple, teal, blue, and green, blending brushes, stamped sentiment from Hero Arts Sending Love Mail

The cover die is made so that the flowers and leaves are cut out along the edges, but not in the middle, so you can pop them up.  The background dots (which I love!) come out so that you can line the whole panel in a colored cardstock, in this case, Audrey Blue. I used the dies here only to fill in the centers of the purple flowers.

And then I used only the layering stencils:


supplies: white cardstock, Petal Pushers stencil set, pastel Pink Fresh Studio and Altenew mini ink cubes, blending brushes, stamped sentiment from Hero Arts Sending Love Mail, enamel dots 

And finally, this card starts again with the stencils, with the blooms dies popped above the card.


supplies: white, kraft, bright gold, and orange cardstock, Petal Pushers stencil set, distress inks and blending brushes, Petal Pushers Blooms dies, enamel dots, Birch Press Design foiled sentiment from Sugar Script Sentiments, teal foil

Because of those dots, I think I like the stencils every bit as much as the cover plate!  

Thanks for visiting today - hope I've piqued your interest!

Tuesday, May 9, 2023

Just a Note

 Another card with my new Antique Rose dies, this time in pinks.


supplies: white, mauve, several greens, and Altenew Cherry Blossom layering papers, PTI Border Bling: Dainty Deliveries Frame die, Altenew Antique Rose dies, sentiment from Mama Elephant Paola's Wishes, Altenew Cherry Blossom enamel hearts

I wanted to try the Altenew layering papers, as they have 4 shades of a color in each set.  On first receiving them, I was disappointed, but when I actually layered them with this rose die, I changed my opinion; they give a nice contrast for each layer.  I paired the rose with this floral cover plate - the little posies could be tiny rose buds, maybe?  

This sentiment has a lovely font, and can be stretched for many occasions! 

Have a great week!

Wednesday, March 29, 2023

Simon Says........Anything Goes


Welcome to a new challenge at the Simon Says Stamp Wednesday Challenge!


It's the end of the month, so our theme for you this week is Anything Goes, and the team is featuring Memory Box products.  I chose a favorite cover die and made 2 cards with it today.


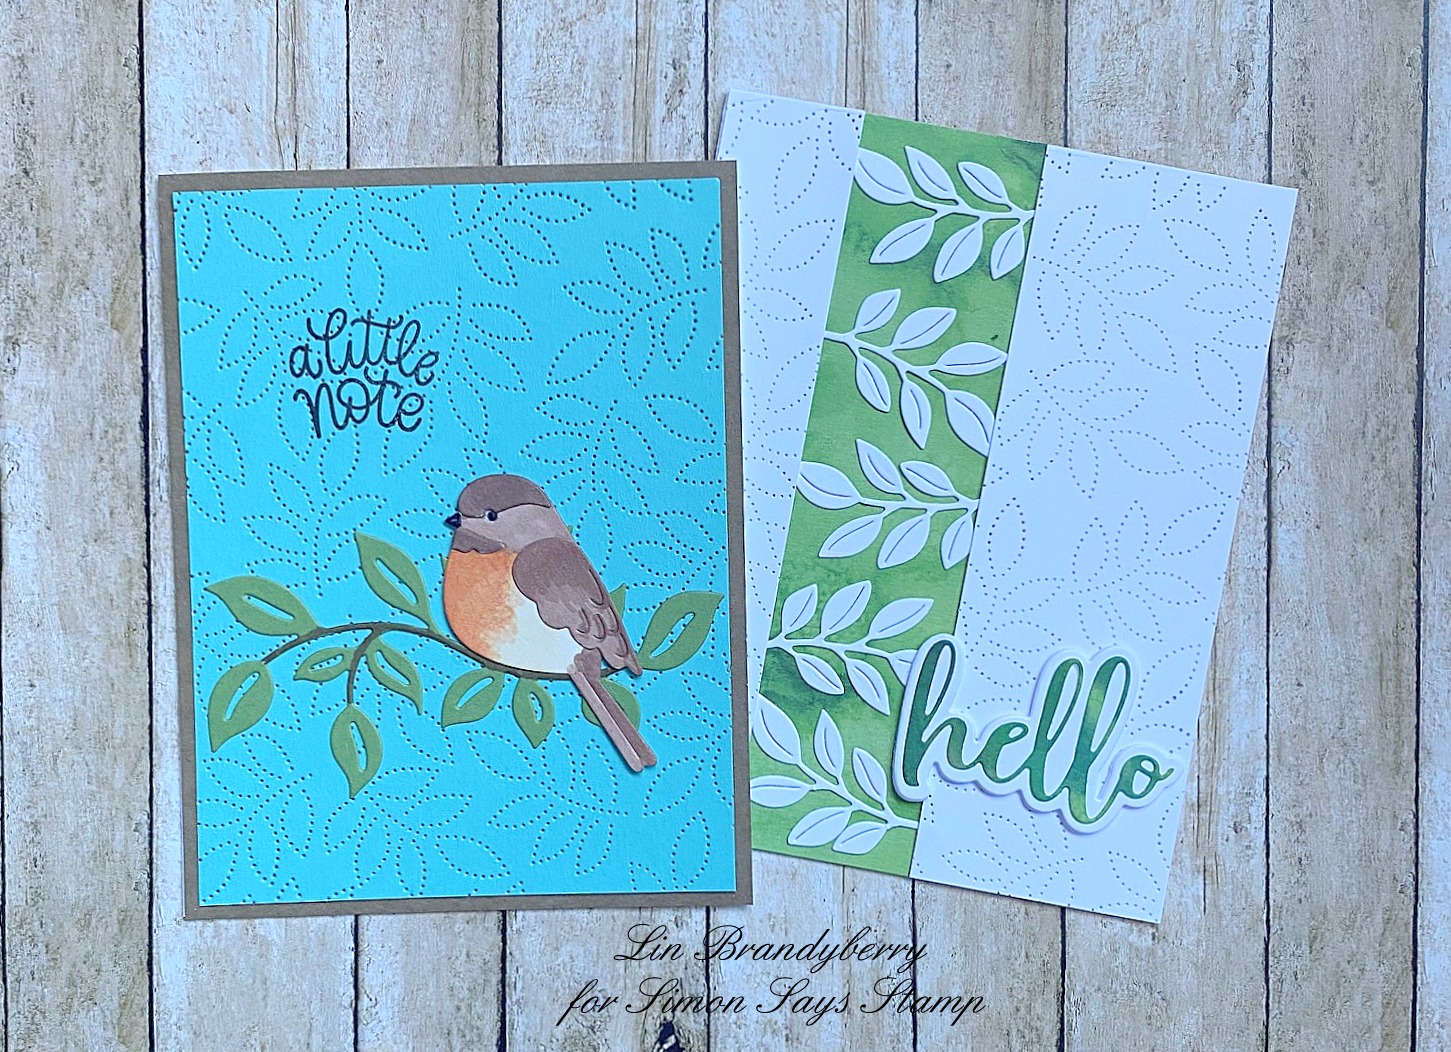
supplies: kraft, Audrey Blue, Green Leaf, and white cardstock, Memory Box Pinpoint Leaf cover plate, Simon Layered Chickadee die and sentiment from Beautiful Butterflies, Pink Fresh Studio Curvy Leaves die

Here's a 2nd card, making leaves the sole theme.


supplies: white cardstock, a mottled green page from an old Basic Grey paper pad, Memory Box Pinpoint Leaf cover plate, Hero Arts leafy branch die, Honey Bee Bitty Buzzwords sentiment die

I thought the little leafy branch was a perfect match for the pinpoint ones in the background.  I recently did a clean-out and organization of my 6" paper pads, throwing away anything I didn't think I'd ever use, and keeping papers that appealed to me still.  Basic Grey always had a nice mix of patterned and solid papers in their pads.  I used a green marbled one for my little background behind the leaf dies, and also for my sentiment.

Now it's your turn!  We have a $25.00 gift certificate 


to the amazing Simon Says Stamp store for 1 lucky random winner of this week's challenge!  

Monday, March 20, 2023

Happy Spring!

Today is the first day of spring!  Here's a shaker card to celebrate!


supplies: white cardstock, a scrap of acetate, Lawn Fawn Floral Wreath die, alcohol markers to color, circle die, Simon Detail Ringlets cover plate, a scalloped die,  Disco Ball sequin mix, foam adhesive strips, sentiment from Newton's Nook Woodland Spring set

I added some of the same sequins to the centers of the largest flowers in the wreaths, too.  

Let's hope that we can get some warmer temps soon!

Sunday, March 12, 2023

Joyful Bouquet

 I finally got the last piece of a suite of products called Joyful Bouquet!  I started with the washi tape and the matching dies first, then the stamp set, and just now the matching layering stencils!  Here are some cards using the stencils.


supplies: white cardstock, PinkFresh Studio Joyful Bouquet stamp, layering stencils, and matching die, Altenew mini ink cubes, Simon Small Blending Brushes, PTI Border Bling: Dainty Deliveries Frame die, Birch Press Design Sugar Script Sentiments foiling plate and die set, gold foil     

I think this is a darling bouquet image!  A good size, too.  The set also includes 6 small floral images.  So I stamped and stencilled them, and then did a 2nd batch using only the stencils to see the differences.


As you can see, when you don't stamp, you lose a few details, but I still think they're pretty.  Here are 2 more cards using these once I die-cut them.


supplies: white and yellow cardstock, PinkFresh Studio Joyful Bouquet floral sprigs stamps, stencils, and matching die, Rise & Shine yellows, Heather and Violet purples, and Lime and Fresh Leaf green inks, blending brushes, Simon Blossom Fields embossing folder, Spellbinders Picot Edge Oval die, Mama Elephant Paola's Wishes sentiment


supplies: white cardstock, Impression Obsession Painted Stripes cling stamp, Firefly ink, PinkFresh Studio Joyful Bouquet Floral sprigs stencils and matching die, Mama Elephant Paola's Wishes sentiment, yellow enamel dots

Thanks for stopping by - hope your day is going well!

Wednesday, January 4, 2023

Simon Says.......Something New


Welcome to the first challenge of 2023 at the Simon Says Stamp Wednesday Challenge Blog!


Our theme for this week is "Something New" - New Year, new baby, new marriage, a new crafting supply; however you'd like to play it!

Studio Light is a new company to me, and I chose 2 coordinating paper pads, 1 of them some beautiful pop-out ephemera, and both of them with a winter garden theme.  My card uses lots of elements from the ephemera pad.

supplies: white cardstock, green paper from Studio Light Greens Winter Garden paper pad, ephemera items from Studio Light Winter Elements Winter Garden die-cut Block pad, Honey Bee Fancy Flakes cover die

I really liked the idea of this lovely lantern to help brighten the dark days of winter, and surrounded it with some pretty winter greens, and a sweet little robin!   I held it together with Press'n'Seal, flipped it to secure all the pieces together on the reverse, and added some adhesive foam so that it would pop above my card base.  The Honey Bee pierced snowflake background is new to me also, but it's been around for awhile.

I'm sorry to say  that this particular ephemera pad is now sold out.  But if you search Studio Light DIY block, you'll find some others that you might enjoy playing with.

Now it's your turn!  We have a $25.00 gift certificate 


to the amazing Simon Says Stamp store for 1 lucky random winner of this week's challenge!