Showing posts with label stamp layering. Show all posts

Saturday, August 2, 2025

August Hero Studio - Ichabod's Study!

The Hero Studio kits for August have been released - Ichabod's Study is the theme, all about Halloween!

My first card mixes elements from the Card Kit, Ichabod's Study, with the Layering Stencils, Sunnyside Manor, for this month.


supplies: black and white cardstock, vellum, purple foil cardstock, Sunnyside Manor layering stencils, orange, lime, purple, and black inks, Ichabod's Study stamps, sentiment, and frame dies

The stamps include a male and a female image with lots of layers, plus some pumpkins, this spiderweb and bat, 6 sentiments, plus lots I haven't used.  Then there are 2 die sets included, 1 to cut out the sentiments, both figures, and some of the elements, and another which has 3 frames to be layered or used alone, 3 sizes of little butterflies, and these glasses.  There's also a stamping guide included to help stamp the portraits, and some rainbow film, acetate, and a light to make the portrait appear and disappear in the frame! (not used here)  Michelle showed off this idea beautifully in her post HERE.

The layering stencils are 4 parts, so I used my go-to Halloween colors to make the wallpaper.

My final card today shows you the Fancy Dies kit, Haunted Gallery, and the female portrait from the Card Kit.  


supplies: white, black, grey, pinks, and pink foil cardstock, a dotted dp, Haunted Gallery dies, large frame, woman, and sentiment from Ichabod's Study card kit

After I'd stamped the lady in pinks, I decided to use pinks and blacks for the rest of my gallery.  The dies in the Haunted Gallery set have 5 different frame shapes, plus lots of things to put inside your frames, 28 pieces in all, including sentiments.

The Studio Collection is available now through the 27th of the month.  This is subscription-based, discounted from retail, and includes FREE shipping (for US customers)!

You can subscribe anytime and cancel hassle-free.

Currently the Studio includes 5 separate kits: a Card Kit, Layering Stencils, Fancy Dies, a Cling stamp, and a Clear Set of Stamps and matching Dies.  You can also get The Whole Studio, which includes all of the kits at a discount, plus a bonus item each month.  

A really nice bonus is that, once you subscribe to any of the kits, you also will get free shipping on all orders that you make at Hero Arts between the 1st and 5th of each month!

Monday, May 19, 2025

Flower Market Bouquet

 Here's a pretty set of layering stamps from The Greetery that has come and gone and I've only used them a few times......time to fix that!


supplies: white and periwinkle cardstock, pale yellow check patterned paper, The Greetery (retired) Flower Market Bouquet stamps and matching die, Simon Says Stamp Heather, Violet, and Iris inks, Altenew Warm Sunshine, Chamomile, and Grass Field inks, Simon Pretty Bows, sentiment from Waffle Flower Full Bloom Sentiments, Lawn Fawn Fancy Scallop Rectangle die

I've done this bouquet before in pinks, and wanted to try something else, and I really like this purple and yellow combo!  (The purples look a bit bluer here than they do in real life.)  I'm loving my new bows dies and garden sentiment set that I got recently, too.

Hope your spring is coming along where you live - this is my favorite time of year!

Saturday, May 10, 2025

Spellbinders Club Kits: Clear Stamp and Die, Embossing Folder, Caboodle dies, and BetterPress Plates

 The Spellbinders Club Kits for May are now available to new subscribers, through May 27.  The theme this month is Pages & Phrases.  Here are my final 3 cards.

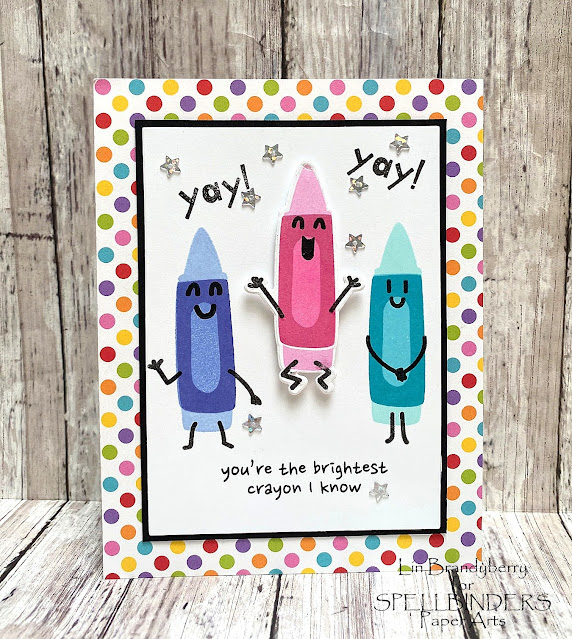
Today I have the Clear Stamps and Dies to show you.  They're named Crayon Creations!  There are 15 stamps, including 5 sentiments and elements to put together these crayon cuties, and the 10 matching dies enable you to cut everything out.  Here's my card.


supplies: white and black cardstock, confetti/dotty patterned paper, Crayon Creations stamps and die, star sequins, adhesive foam squares

When I saw the "brightest" sentiment, I decided to use bright colors of inks.  I first did the pink one, using the appropriate die first, then stamping onto it.  The other 2 crayons were stamped onto my trimmed rectangle panel, leaving a space in the middle for the die-cut one.  Then I just stamped my sentiments, matted the panel, mounted it onto some paper that looked like confetti, and added some star sequins for glitz.

If you want to make the same kind of card, but use only dies, then the Caboodle item for this month, Yay! Crayons, is for you!  This is a set of 10 dies.  (I didn't use them all on my card today).  I mixed them with the embossing folder, Abstract Study, and used a sentiment/matching die from the stamps/dies of the month.


supplies: white, black, and colored cardstock,  black and white stripe pattern paper, Caboodle Yay! Crayons dies, Abstract Study embossing folder, Crayon Creations sentiment and matching die

Lastly is my BetterPress card.  The kit is called From A to Z.


supplies: green and white cardstock, a subtle-print from my stash, Spellbinders From A to Z Betterpress plates/die, leaves from Club Blooms, butterfly from my scrap basket, adhesive foam strips to lift sentiment

The plan was to surround the sentiment with leaves, but I felt it needed something else, so I got out my scrap basket and added this stamped butterfly.

Here are the Club Kits I used today; just click on the picture and you'll be whisked away to the Spellbinders store!


You can look HERE for information on Spellbinders Clubs.  Each is available for new subscribers only from the 6th until the 27th of each month.  If you click on my links under each card, you can see the specifics of each product.  You can subscribe to each of our 10 kits separately, (and you can "unjoin" a subscription at any time without any penalty), or you can get them all, plus a free bonus item each month, and save 60% by choosing the Deluxe Caboodle!  

Tuesday, September 24, 2024

Little Chickadee

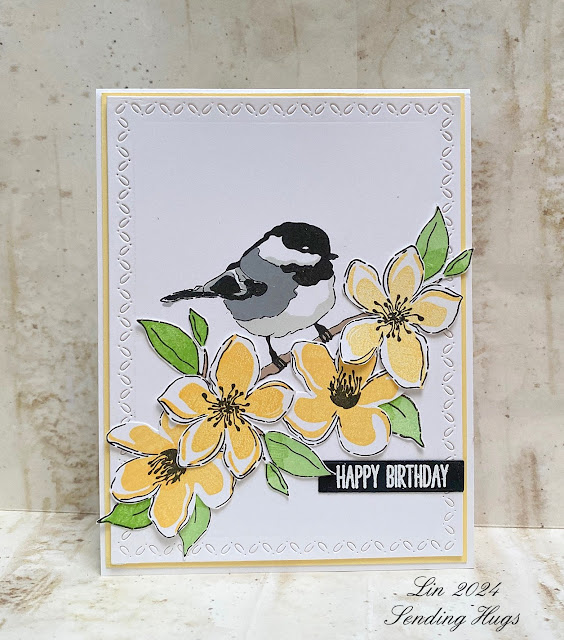
 Here's a stamp I picked up earlier this month, one of the STAMPtember collaborations; this one with Ink on 3.  It sold out almost immediately, so I'm so glad I grabbed this little chubby charmer!  I love my birds, and chickadees are a favorite.  I believe this is the first one that I can stamp (others are dies).


supplies: white and pollen cardstock, Little Chickadee stamp set, black, greys, Chamomile, Firefly, and Grass Field inks, Penny Black (retired) Stitched Stackers die

I started by stamping the bird and branch in the center of my A2 panel, then separately stamped and fussy-cut the flowers and leaves, and embossed one of the sentiments from the set in white on black.  The panel was then trimmed with a stitching die, matted with yellow and added to my white card base.  

I love layered stamping sets, and these were easy to line up.  I think this set will get good use for masculine cards, especially by keeping the flowers to a minimum.

Tuesday, January 16, 2024

Hello Beautiful

Today's card uses a layering stamp and matching die from The Greetery, but I'm sorry to say that it's been discontinued.  I wanted to use the color of the year, peach, on it.


supplies: white cardstock, The Greetery (retired) Sketchbook Roses stamps and matching die, Simon Trio #9 inks (melon, canteloupe, and sherbert) and Altenew Spring Bouquet greens, blending brushes, The GreeteryTartan Builder Diagonal layering stencils

I've used these stamps several times before, and it's so versatile for teaming up with different backgrounds.  This time I decided to stencil a simple plaid and pop the florals up above it.

How is your week going?  Hope you're keeping safe and cozy during this crazy weather!  Thanks for stopping by!

Monday, December 18, 2023

Christmas Greens

I wanted to give some love to some older products, and here is the card that resulted.  


supplies: white, Lipstick Red and Schoolhouse Red cardstock, The Greetery Winter Budding Beauties layering stamp set and matching dies, Fit to be Tied bow dies, Spellbinders Holly Flourish embossing folder, sentiment from (retired) Concord&9th/Simon colab Festive Flower, Pink Fresh Studio Folk Edge Rectangle die

I believe this is the first time I've used these bow dies!  I popped it and the pine berry sprig up above the rest of the card.  

Are you ready for Christmas?   

Friday, October 27, 2023

Sending Warm Wishes

 Here's another set from The Greetery that can be used all year long, but I made it into an autumn card today.


supplies: pool and white cardstock, plaid dp from Lawn Fawn's Perfectly Plaid Fall, woodgrain plank dp from SN@P Wood and Notebook Basics, The Greetery Cozy Cup layering stamps and matching dies, Cozy Cup Coaster, stamped flower from The Greetery Banner & Bough, Altenew mini inks

After choosing my pattern for my coaster, I chose colors that matched it for my stamping.  The sentiment reads "sending warm wishes".

This is the perfect season for enjoying a cup of coffee or cocoa or tea with a friend, isn't it?  

Thursday, October 19, 2023

Festive Flowers from STAMPtember

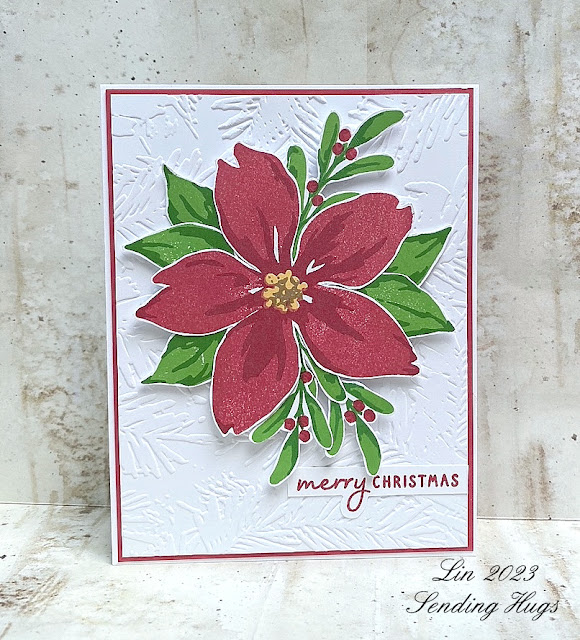
 Here are 2 cards that I made with my new Simon Says Stamp/Concord & 9th collaboration stamp called Festive Flower released during STAMPtember.  It sold out, of course!

First I stamped it in traditional Christmas colors and put it against a pine embossed background.


supplies: white and red cardstock, Festive Flower stamps and sentiment, 2 shades of red and 2 shades of green ink, Spellbinders In the Pines embossing folder, adhesive foam

Next I made it in pinks and teals and added some frosty snowflakes and a bit of glitter on the pines.


supplies: white cardstock, Festive Flower stamps and sentiment, 2 shades of pink and 2 shades of teal inks, a retired Simon Snowflake (Hand Lettered Winter Wishes) embossed in white, spun sugar distress ink, clear rock candy distress glitter, adhesive foam squares

I chose this set because of the large poinsettia stamp.  It can carry a card all by itself.  And I thought the other accompanying sprigs in the set were nice additions, along with the variety of sentiments.

Thanks for stopping by today!

Tuesday, September 12, 2023

Autumn Blessings

 Looking back through my older supplies, I was horrified to see that I've only used this pretty bottle only once before!  So now's the time to give it some love.


supplies: white cardstock, The Greetery Tartan Builder Diagonal, (distress inks in squeezed lemonade, saltwater taffy, and picked raspberry distress inks), All Bottled Up, Budding Beauties Autumn, and (leaves from) Autumn Sketches, Altenew mini ink cubes in pinks, yellows, oranges, olive, and brown

After stamping and cutting out the bottle, berry sprigs, and leaves, I arranged them onto a trimmed white panel, sponged in the center with some yellow ink.  I was originally going to just put this over a white card base, but found this plaid that I had made last year some time, and thought it was perfect!

LOVE it when that happens!  The little label is a mix of sentiments from the bottle set and the Autumn Sketches - it reads "Autumn Blessings from me to you".  I decided that would stand for my sentiment.

I really enjoyed working with these colors - a nice change from the traditional fall colors!  

Saturday, July 1, 2023

Peach Peonies

 The peonies this year were huge!  For once, the rain didn't ruin them, but we had a hot spell that hurried their life span and they didn't last long anyway.  I remembered this Lush Garden set of layering stamps, stencils, and dies, and paired them with a gorgeous 3D embossing folder that looks like peonies to me.


supplies: white cardstock, Altenew Lush Garden layering stamps, matching simple stencil, and matching dies, Altenew Garden Party, Green Valley, and yellow inks, Spellbinders Four Petal Floral 3D embossing folder, (retired) Tammy Tutterow sentiment die, Altenew Tea Party enamel heart

I used the darkest of each color family for the outline stamping, and the very lightest of each with the simple stencils to fill in the whole image.  

My peonies are the old-fashioned white, pale and dark pink ones, transplanted years ago from a neighbor.  I would love to have some that are this peachy color!  Do you have any unusual peonies in your garden?

Enjoy your weekend!

Sunday, February 26, 2023

Pink and Grey

I was do-less, as my husband terms it, recently, and was looking through my Greetery goodies, and came across a stencil set that, again, has hardly been used.  So I decided to pick some colors that I don't usually use: pink and grey, and have some playtime!


supplies: white cardstock, The Greetery Square Dance stencils, kitsch flamingo and hickory smoke distress inks, The Greetery Sketchbook Roses stamps, Pink Fresh Fairy Dust and Altenew Rock Collection mini ink cubes, Wplus9 (retired) Hand Lettered Hello sentiment stamps, pink enamel dots

This stencil set looks like woven ribbons to me.  This Sketchbook Roses stamp set has sadly just been retired last year; too bad, it's always been a favorite of mine.  After stamping, I trimmed it out by hand and then popped it above the stencilled background, adding my (also retired) sentiment and some enamel dots. 

This has a moody look to it, which is interesting to me.  What do you think?

Thanks for stopping by!

Friday, February 24, 2023

Winter Blues

Can you stand another card using these Antique Rose stamps?   I had stamped them in various colors, but never used these aqua ones, so I decided to do a monochromatic version.


supplies: white, and aqua foil cardstock, dotty dp from Whimsy Stamps Mix n Match 2 paper pad, Altenew Antique Roses stamps, Sweet Dreams and Green Valley inks, Fine Frames die, foiled sentiment from Birch Press Design Sugar Script Hot Foil Plate and Die set, teal glimmer foil, adhesive foam

I started with this paper with a mix of different sizes and shades of aqua dots.  Then I cut some fine frames from aqua metallic cardstock next, to reinforce my foiled sentiment, then arranged my florals and sentiment and popped them above everything. 

I didn't think of it until after I'd named my post for today, but those dots do look a bit like falling snow!  

Thanks for stopping by - have a good day!

Friday, February 17, 2023

Flowers and a Smile

 February is the month I most dislike because it is almost always dreary.  Spring is always on my mind, so I pulled out a multi-step stamp set and made myself some spring!


supplies: white and a pale green cardstock, Altenew (retired) Hope stamp set, Cherry Blossom, Green Fields, and some yellow mini inks, Sunny Studio Eyelet and Lattice Frilly Frames dies, foiled sentiment from Spellbinders Glimmer of the Month kit: Tulip Border, magenta glimmer foil, adhesive foam squares and strips

This stamp set has a date of 2017 on it, and I'm ashamed to say it's only been used once before this; AND it's probably not the only set that I can say that about.  My New Year's resolution should be to play with what I already have instead of buying new.  I'm sure I'm not the only one thinking along those lines.

Anyway, I'm pleased with the results of this card and it brought me some sunshine while I was working on it.  Wishing you some sunshine, too!  Thanks for visiting.

Friday, December 24, 2021

Merry Christmas!

 One more Christmas card for this year - and I'll use it to wish each of you a blessed holiday - Merry Christmas!.


Monday, November 15, 2021

A Greetery Christmas Card

 I'm starting on my Christmas cards.  Today's card is all The Greetery goodies, mixed with my old favorite Spellbinders Hemstitch Rectangle.


supplies: white and Lipstick Red card, The Greetery Budding Beauties Winter stamp and coordinating die, Opposites Attract Holiday sentiments, Fit to Be Tied bow die, Altenew Crimson and Teal Cave inks, Spellbinders Hemstitch Rectangle die 

I stamped and die-cut the berry branches and die-cut the bow.  Then I simply cut out the hemstitch details and stamped my sentiment before adding the die-cuts.

Again, this is nice and flat for mailing.

Have you started your Christmas cards yet?

Friday, October 29, 2021

Winterberry Bouquet

 Here are 2  more cards using some new goodies from The Greetery.


supplies: white and Audrey Blue card, Winterberry Bouquet layered stencils and stamp, Opposites Attract Holiday sentiment stamps, Altenew Mini Ink Cubes, Hero Arts 2004 woodblock Three Holiday Messages, Penny Black Stitched Stackers die

After stencilling the bouquet, there are 2 stamps to add details to it.  The panel was then trimmed with the stitched border.  I wanted something in the background, so I used the Winterberry Bouquet mask and randomly stamped the Joy to You before attaching the panel to my card base.  I didn't invest in the matching dies, so my sentiments were fussy-cut.  

Next I used some of the little individual leaf and berry cluster multi-step stamps on my 2nd card.  


supplies: white and Lipstick Red card, Winterberry Bouquet layering stamps, Opposites Attract Holiday sentiments, Altenew mini ink cubes, (retired) snowflake embossing folder, adhesive foam squares

There are 4 extra layering stamps in the Winterberry Bouquet set, which I stamped and then arranged.  I loved the Christmas carol sentiment from "I'm Dreaming of a White Christmas" that you can piece, so after stamping them onto my panel, I debossed a snowflake background.  Then I just lifted the little berry arrangement above the card.

Thanks for stopping by today.

Saturday, March 27, 2021

CASE-ing Dawn

Here's a card I CASEd from my friend Dawn's blog.

 I loved everything about this 2nd card of Dawn's, and pinned it the instant I saw it.  Our son has a birthday this month, and when I was playing with the largest bloom from my new Lovely Blossoms stamps, a bell went off and I used Dawn's card as inspiration for this one. 


supplies: white, black, and sage green cardstock, MFT plaid patterned paper, The Greetery Lovely Blossoms, Altenew Deep Blue Seas and Green Valley mini ink cubes, adhesive foam to lift flower

I loved Dawn's sketch, and especially matting everything in black.  Along with the plaid, I thought this made my card a bit more masculine despite it's large floral.  

Can you believe our oldest will be 46 this year?!!  We can't! 

Sunday, March 7, 2021

Lovely Blossoms

 My card today was inspired by Kelly's card .  At the time I saw it, I thought I didn't "need" these Lovely Blossoms stamps from The Greetery but Kelly changed my mind!  Here's what I did as soon as I got this set.


supplies: white cardstock, The Greetery Lovely Blossoms layered stamp set, Altenew mini inks (Green Valley, Tea Party, Golden Sunset, and Deep Blue Seas), Square Dance layering stencils, Hero Arts Nesting Circles die, adhesive foam squares

There are 2 sizes of these flower in the set - here I stamped only the smaller one and some extra leaf sprigs.  I used 3 shades of the ink sets to stamp my flowers, 2 shades for the leaves, and 3 shades for the basket-weave background.  After creating the flowers and leaves, I cut them out, arranged them on my stencilled panel, then used Press 'n' Seal to hold them in place while I attached foam squares to the back of the arrangement.  

Thanks to Kelly for reminding me to pull out this gorgeous Square Dance stencil set for my background!

Thanks for stopping by - please come back again!

Wednesday, February 17, 2021

Simon Says..........Favorite Technique


Happy Wednesday - welcome to our challenge at the Simon Says Stamp Wednesday Challenge Blog!


This week we want you to share your Favorite Technique with us!  The team is playing with My Favorite Things goodies!

One of my favorite techniques is the Eclipse, or Hidden Sentiment, technique.  Here's my card.


supplies: white, Audrey Blue, and Green Leaf cardstock, My Favorite Things Big Birthday Wishes die, and their (retired) Flashy Florals layered stamp set, Altenew mini inks, Doodlebug sprinkles

Starting with a panel of white A2 card, I first made some little pencil dots to guide me where the BIG sentiment would lie.  Then I stamped flowers and leaves in that general area, masking as needed. The centers of each flower were white embossed as the final step.  

Next I centered the large die on the panel and made my cut.  I saved the "BIG" letters and the details of the smaller words.  Next I attached 2 strips of blue and green cardstock under the lower words, then glued the panel to my card base.  I used those little pieces of the die-cut that I had saved to add details to the letters.

All that remained was to cut about 6 more layers of "BIG" and glue them to the stamped layers before adding them to the finished card, along with some matching sprinkles for the centers of each flower.  

Now it's your turn!  We have a $25.00 gift certificate 


to the amazing Simon Says Stamp store for 1 lucky random winner of this week's challenge!  I can't wait to see what you all make this week!

Tuesday, May 7, 2019

CASEing Jennifer

Jennifer McGuire recently did a video that included combining some cover plate dies as a background for some florals.  Here's my take on that idea.


supplies: white and silver foiled cardstock, Wplus9 Floral Background die, Altenew Build a Rose set, Cherry Blossom and Green Meadows mini ink cubes, Penny Black Your Day die

This beautiful rose is stamped with 6 layers of stamps!  I used the darkest ink color for the last 3 steps.  

Hope to see you tomorrow for a new Simon Says Stamp Wednesday challenge!