

supplies: white cardstock base, Cornflower Blue cardstock, and Bristol paper, Broken China, Faded Jeans, and Cracked Pistachio distress oxide inks and water, Tim Holtz Flourish stencil and Nuvo Moonstone glimmer paste, Simon's Leanna Butterfly and Script Thanks dies, sequin
I smooshed each ink one at a time on my craft sheet, misted with water, and dragged my Bristol paper panel through it, then dried it, sprinkled it with plain water droplets, dried again, and moved on to the next color, doing the same thing. After I got my panel to my liking, it dried well before I attached the stencil and used the glimmer paste through it. When dry, the panel was trimmed to the width of the stencil, framed in cornflower cardstock and attached to my card base. Then I just added my die-cut sentiment (using the last little bit of the oxide panel) and the butterfly.
A little caution - pop that stencil into a bin of water as soon as you remove it, and wipe it clean asap.....this glimmer paste is glue, after all, and will leave a residue if you don't attend to it quickly.
A little caution - pop that stencil into a bin of water as soon as you remove it, and wipe it clean asap.....this glimmer paste is glue, after all, and will leave a residue if you don't attend to it quickly.
Here's another variation, using more colors.......it reminds me of a summer garden or a vibrant sunset! And I'm so glad I got this beautiful Flourish stencil!
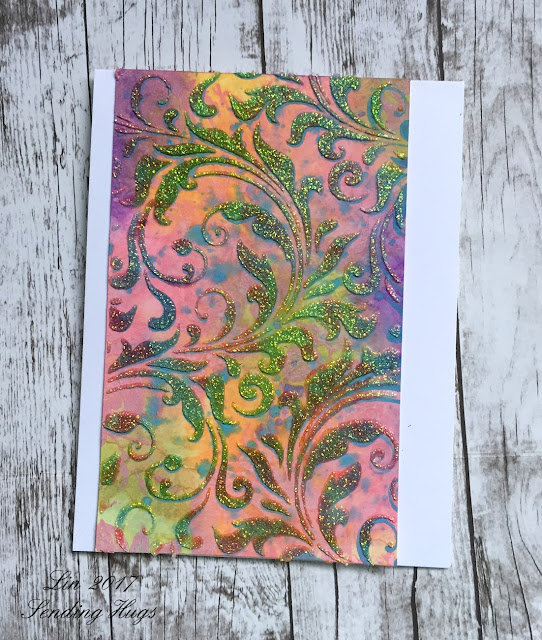

supplies: white cardstock, Bristol paper, worn lipstick, wilted violet, spiced marmalade, peeled paint, and broken china oxide inks, water, round ink blending tool, Tim Holtz Flourish stencil, Nuvo Moonstone glimmer paste
This time I sponged areas of each ink onto Bristol paper, then spritzed it with water and let it blend a bit. I also splattered big droplets of broken china on it and sponged broken china through the stencil, then added the glimmer paste. In this photo, the glimmer paste looks blue and green, but in real life, it adds a golden glitz to each of the colors. I think I may try adding black accents to this one........what do you think? Which is your favorite?
I hope you'll come back tomorrow - I'll have another use of stencils then, 2-step ones!
I hope you'll come back tomorrow - I'll have another use of stencils then, 2-step ones!
11 comments:
both are really pretty, Lin - i like that i can see the flourishes better on the second one
Wow, those pastes really make an impact over your oxide backgrounds. Lovely!
So gorgeous!! Love the subtle glimmer on the first one, that background is impeccable! The second is very colourful and vibrant, I don't think it need anything else.
Lovely cards Lin! Your backgrounds are so fancy!!
WOWZERS Lin. The backgrounds are amazing. Can't choose between them. Each is as stunning as the other.
Oh how stunning Lin - love how you have used the inks to make these classy cards. Yes, the second card could 'handle' black on it as the colours are stronger
BLessings
MAxine
Both cards are GORGEOUS! I like the subtle look on the first one, but I REALLY love the vibrant colors on the second!!! It is very hard to pick just one, as the are BOTH stunning!!!
Lin both your card and your second project are gorgeous. That glimmer paste and the oxide inks go well together.
Wow! You sold me. I love your cards, finished and unfinished. Your inking is beautiful, and I love that glimmer paste with that stencil. TFS.
Beautiful !!!
I just love this technique. Thank you for sharing your talent.
Post a Comment